Thursday, January 29, 2015

Danika gets a face

Well, since we are moving in the next few weeks, I went ahead and jumped on getting Danika a faceup. When all the real-life hustle and bustle begins, who knows when I'll have time for her. I do still want to give her a body blush, but at least she looks presentable now. She'll have an auburn wig and blue eyes (hence why her wig in no way matches her faceup).


Danika

Danika

Danika

More photos can be found in her Flickr album. Just click the 'Dolls' tab on the nav-bar for a link there.

Dollzone Freddy Arrival

My Dollzone Freddy 1 on DZ female body arrived Monday ;)
So... box opening - nuff said.

DZ Freddy Arrival


DZ Freddy Arrival


DZ Freddy Arrival


DZ Freddy Arrival


DZ Freddy Arrival


DZ Freddy Arrival

DZ Freddy Arrival


DZ Freddy Arrival


DZ Freddy Arrival


Little Doll Inspector
My daughter, the BJD Inspector. She always gets first dibs on handling.

DZ Freddy Arrival

I've named her Danika.


Monday, January 26, 2015

Denahli - MNF Chloe gets a face

I got some free time last week, so I gave the Minifee my husband gave me for Christmas a faceup. Meet Denahli. I'm thinking a wild black wig is in order.

Transition

Stone

Spark

Burn

Bubblegum

Darkness

Wednesday, January 14, 2015

Volks Wig Review

I recently purchased a Volks bob-style wig in size 9-10. On the top of the box, it says "ITEM W-55N COL 33T". I'm assuming those are the style and color codes. Anyway, the color is superb - a platinum (almost white) blonde.


Touching the wig, it feels very soft and smooth and has great movement to it. Not at all stiff or plastic-y. There were some flyaways, but nothing major.


The part looks very good from the top... very natural and no cap showing between the two sides.


Now, I did notice the wig cap shows through when viewing from the side. The hairs can be rearranged to cover I suppose.


The cap is also visible from the front unless the bangs are smoothed just right. I'm not sure if it's just because this wig is such a light color or if Volks just isn't sewing in enough fibers to fill out these spaces, but with a retail value of $36, I'd expect better quality. I'm not disappointed since I didn't pay full price on this one, but bought it new off of someone else.


So, in my opinion, though the style and color are adorable, and the fibers are soft and bouncy, I wouldn't pay full retail for this wig.

Faceup Supply List


These are the supplies I've had the most luck with. Keep in mind, there are many different options out there, so don't feel like you're only limited to the brands listed here.

A word of caution: Do NOT use anything with oil in it. Oil pastels and the majority of human makeup are big no-nos. These products can cause staining or even deterioration of the resin over time. Sealants also do not set over oil based products.


Sealant

Sealant is needed to 1) protect the resin from staining 2) provide a tooth for products to stick and 3) seal and protect work. Most sealants take about 15-30 minutes to dry completely, sometimes less. All brands are toxic if inhaled, so be sure to protect yourself with a respirator each and every time you spray and NEVER spray in a poorly venitlated area.


Mr Super Clear Flat and Testors Dullcoat (I soak my cans in warm water before use and it dissolves the paper labels)

The following brands have been tested and are safe for BJDs: Mr. Super Clear Flat, ZM Finishing Powder Spray, Citadel Matte Purity Seal, Testors Dullcoat, and Model Masters. The easiest to find in the United States being Testors. I think some people have also found Citadel Purity Seal and Model Masters in their local hobby stores as well. The others will need to be ordered online if you're in The States.


Faceup Remover

A lot of people swear by rubbing alcohol or brush cleaner for faceup removal, but I've always just used 100% acetone. It's quick, easy, and cheap to buy. This stuff will take off just about anything. Just be careful, and test it somewhere on your doll beforehand, because there have been reports of adverse reactions to some resins. I've yet to have a problem using it though. Due to the strength of this remover, DO NOT soak any part of your doll. Do a quick wipedown, allowing the acetone to evaporate and not pool, and then wash off with soap and water.


100% Acetone

If you're looking for a remover for plastic doll repaint projects, you may want to go with a less strong product. I have used acetone on Monster High and didn't have an issue on the vinyl head, but it melts the plastic bodies. Use with caution on any surface, and always test first.


Brushes

There are no specific set of rules about what brushes to buy. Different people have different preferences on size, shapes, brands, etc. Just go poke around your hobby store and get a feel for the different brushes. You're mainly going to want a teeny brush for small details like eyelash/brow hairs, a medium size round brush for pastel blushing, a smaller round (or even an angled) brush for blushing around nose/eyes/ears/etc., and a big fluffy brush to dust away stray pastels and keep your work clean.


Pastels

Chalk (or soft) pastels is what you want to look for here, not oil. Some good brands I'd recommend are Rembrandt and Faber Castell. Just try to look for "Artist Grade" quality. Cheaper pastels have less pigment and more filler and normally don't smooth on as well.


Faber Castell and other various brands

A few more recommended tools (shown in the right compartment of the tray) are : tweezers, blade (Exacto knives work well, but the one shown is a simple box cutter) - used for shaving pastels if you'd rather not use sandpaper, and kneaded eraser - useful for shaping pastel work such as eyebrows.


Watercolor Pencils

Please be aware that there is a huge difference between watercolor pencils and regular color pencils. Regular color pencils will not stick to resin very well and will create a waxy look. My favorite brands of pencils are Prismacolor and Derwent. Please be aware that if you decide to use these, go ahead and invest in a good quality sharpener. The cores are very delicate and break easily if the blades are not sharp enough.


Paints

The most commonly used kind of paint for BJDs is acrylic paint. Now, pretty much any sort of acrylic paint will be safe for resin, but you're going to get what you pay for. Cheap craft grade paint will not work as well as artist grade paint. You can MAKE it work in a pinch, but it won't be fun. My favorite brand is Liquitex.


Liquitex Basics 24 count acrylic paint set


Paint Thinner / Retarder

While acrylic paint WILL work right out of the tube, it'll go on much smoother with some sort of thinner or retarder. The kind I use is Liquitex Professional Slow-Dri Fluid Retarder. It keeps my paint from drying out too quickly and keeps my paint nice and fluid.


Gloss

Gloss makes areas like lips and eyes dynamic and pop. It makes your work looked well finished. There are different options as far as how glossy you want things to get (high gloss, medium gloss), but I've actually found that with the Liquitex Basics Gloss Varnish, you can dilute with water to achieve the level of luster you're looking for. More water added = dull sheen (think eyebrows) / straight out of the bottle = high sheen.


Glue

I'm just going to give a quick little recommendation for glues that work well to hold eyelashes on. Elmer's White Glue is pretty good, but I've noticed it leaves a sort of residue and the hold isn't fantastic. Aleene's Tacky Glue is my favorite. It dries clear and flexible and the hold is much better. If you get the Turbo kind, it dries faster and you're not stuck there holding lashes in place for 5 minutes.


Misc Supplies

Paper towels, Q-tips, Magic Erasers, and even toothpicks are helpful to have in arms reach. Also sandpaper for grinding pastels onto, a cup or water, and a little palette or plate for mixing paints.


If you're starting out and want a quick, easy solution, Volks carries a faceup starter kit for $65. It appears to come with all the basics.

Tuesday, January 13, 2015

Please excuse my mess!

I realize that I've just flooded the blog with random pages of my website, and I apologize if I've bogged anyone's scrolling down ^^;

I'm in the process of moving my entire website over to the Blogger system. This will make updating so much quicker and easier for me, plus allow for visitor feedback/comments/questions on each page.

Thanks for your patience while I get everything sorted and linked back up properly. If you happen across any broken links, please let me know!

Information, Tips, Tricks, and Reviews

Please be aware that this section contains information I've learned over the years in the hobby. There is no one right way to do anything, but these are just things that have worked for me.

Basic Maintenance

Stringing information and tips
Improving posability
Cleaning and basic stain removal/prevention
Wigs
Fixing scratches, cracks, broken parts


General Information
All about eyes
Yellowing
Should I keep the box and stuff?


Customization

Faceup/body blush supply list
Toe/finger separation
Finger bending (hair dryer method)
Seam line removal
Piercings
Matting shiny resin
Tattoo cheat


Community
Creating avatars and sig banners
Sharing photos
Buying / Selling Advice


Reviews
Resinsoul doll review
Volks wig review

Resinsoul Doll Review

I purchased a Resinsoul doll from the Den of Angels Marketplace in late 2014. As this company seems to have mixed reviews (either people really love or really hate these dolls it seems), I thought I'd share my experience and thoughts.

Here is the company website: Resinsoul

What was purchased: 68cm Resinsoul Ling in white skin, cast in 2013


Company
I bought her secondhand, so I don't have much of a company review. I can say that both times I emailed RS, they responded within 24 hours and provided photos to assist me. They were very polite.

Resin
I've handled dolls from various more expensive companies (Dollshe, Elfdoll, Souldoll, Fairyland, etc) and I must say the resin quality is at about the same level. It's matte, smooth to the touch, and the color is completely even. No seams were visible. The doll was quite lightweight as compared to other dolls of this size.

I did notice that down the legs, the resin wasn't completely smoothed. There are little smooth dents down the legs, almost like a light case of cellulite. I don't feel like this was damage that occured after the doll was made, but more that it was a casting issue. Not a huge issue, as the resin could be smoothed with sandpaper.


blank head


hands


feet

Skintone
RS white skin is PAPER white. It was a little shockingly stark at first, but it would actually work very well for a gothic, ghost, or fair-haired character.

Posability
I know a lot of people recommend these dolls to newcomers in the hobby as a first doll, the price being lower than most other companies. I do not. The posability of these dolls is very poor without some help. Even after restringing, the arms and legs were very kicky, the torso popped out of place quite often, and the doll absolutely could not stand on her own. After sueding and wiring, the posability did become more manageable and she could stand, but it's still not dolly dreams are made of. I do like the double-joints though. I feel like the addition of exta joints is very nice, especially considering the price. This girl also sat very erect and sturdy even before any modifications were done.

Added note: I've used acetone on this resin and noticed no adverse reaction.

Buying and Selling Tips

The secondhand marketplace can be a beautiful thing. You can find discontinued dolls, handmade or unique items, and great deals on all your dolly needs. You can also sell a doll you're not quite clicking with, get rid of older items you no longer use, sell that brand new pair of shoes that just wouldn't fit your doll's foot, sell off items to raise money for that sparkley new BJD you're craving, or even find someone to trade dolls/goods with. It can also be a lurking place for scammers, flaky buyers, and recasts. So it's important to keep a few things in mind to stay safe when buying and selling secondhand.


Places to buy/sell?
One of the most popular and well-known secondhand marketplace is Den of Angels. DoA has a strict set of rules, including the immediate banning of a member dealing in recasts, so it's probably the safest place to conduct business. There is also a feedback system in use, so you can check out a seller/buyer's transaction history beforehand. If something does go wrong, the moderators step in to try and help you resolve the issue. Mods also keep strict watch over the sales threads to make sure everything stays tidy and everyone plays by the rules.

There are also several private Facebook groups that are for buying and selling BJDs and BJD related items. These are quite a bit riskier, as you never really know who you're doing business with. There is little to no feedback available to ease your mind, so you're basically running blind. Not to say that all (or even most) of the seller/buyers on FB are shady, but there are less safeguards in place.

eBay... This is the recast mothership. While there are actually owners, as well as some companies/dealers, selling legitimate dolls here, this is where you're most likely to have to put your recast-spotting skills to good use. It is illegal to sell recasts, and goes against eBay's terms of agreement, but they're still there in abundance. Be very careful when shopping there, and make sure to do your research before fishing out your wallet.

I believe there are marketplaces on Tumblr and Flickr as well, but I've never dealt through other sites. The same guidelines apply regardless of where you buy though.


Buyers
When buying a doll secondhand, make sure the first thing you do is check the seller's feedback. If going through DoA, it's as easy as clicking on the seller's feedback thread. On Facebook, you can sometimes ask if the seller has a feedback thread on DoA (most BJD folks seem to have an account there) or ask them if they have feedback elsewhere. I've actually Googled a seller's FB name and found their DoA feedback thread that way. Even if a seller does not have a DoA account, they may have feedback on eBay (not always reliable) or Etsy. Don't always trust eBay feedback. There are buyers out there who are knowingly purchasing recasts, so of course they'd leave a recaster good feedback. Just make sure you know their selling history. A seemingly sweet transaction can go sour quickly.

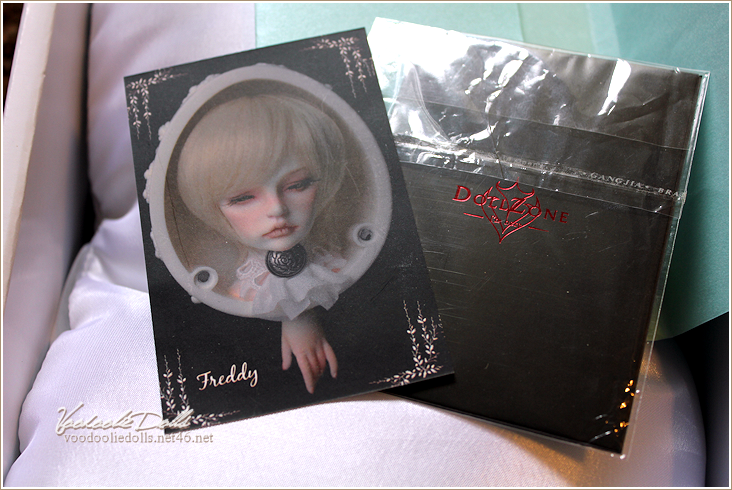
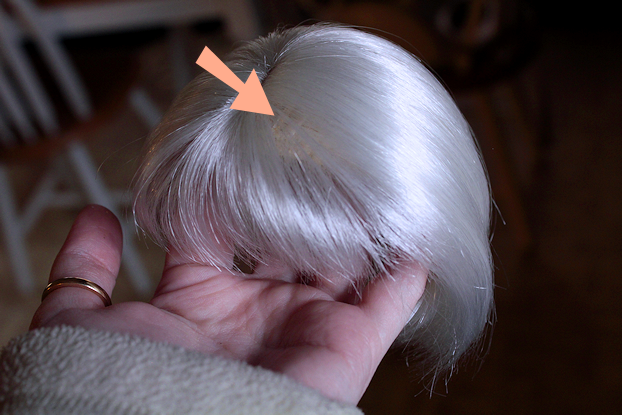
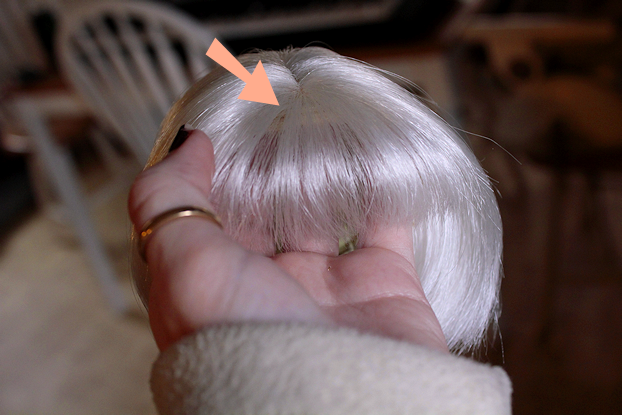
Ask for some proof of legitimacy. Doll's paperwork and boxes can go missing over time, so just because these are not included in a sale does not mean the doll is a recast. Ask for additional photos before signing on to buy. Make sure the inside channels of the doll are clean and smooth (recasts are often pretty messy inside). Check that headplates or company logos are accounted for. If you're still unconvinced, ask for a screenshot of the original purchase receipt (this won't be available to dolls who the seller bought secondhand).

Never ever send you payment unprotected. On Paypal, make sure you're sending under the "Pay for Goods or Services" tab. Many sellers will tack on hidden costs after you've agreed to purchase to cover their seller's fees when you use the goods or services option. You'll also often see that sellers will list that the Paypal fees are to covered by the buyer. This is against Paypal's terms of service, as the fees are actually the seller's responsibility and not to be pushed onto the buyer per PP's terms, but it's an ongoing practice in the BJD market. Whether you agree to cover the fees or refuse to purchase is up to you, but never let a seller talk you into sending as "Friends and Family" or "personal" payment. By using personal payment, you knowingly drop Paypal's buyer's protection. If anything goes wrong, you're just screwed. Make sure your purchase is protected.

Please be sure to let your seller know when your items arrive. I've sold items before and the buyer would just drop off of the face of the planet, leaving me wondering if everything arrived safely. Not a good feeling. Also, be sure to leave feedback explaining your level of satisfaction with all aspects of the purchase: seller's communication, how quickly item was shipped, how item was packaged, etc. Other buyers will want to know. Please do keep in mind that once the package is in the postal system's hands, the seller has no control over it. Don't leave crummy feedback if there was a ding in the packing box or the ship time took longer than expected on the post's end.

Also when you're inquiring about an item, but decide you're not interested, please let the seller know. They may be turning down other potential buyers while waiting for you to make up your mind.

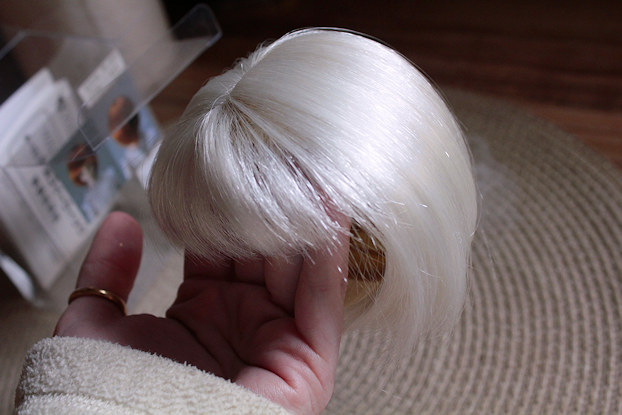
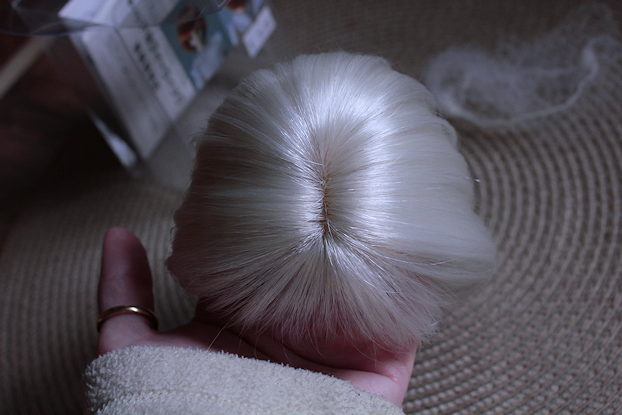
When buying accessories, wigs, clothing, shoes, eyes, etc. secondhand, be mindful of sizes and do your own research. A seller does not have your doll in hand to tell you if it will fit exactly. It's up to you to figure out what will fit. Ask for measurements if need be. I've seen far too many snarky feedback posts where a buyer is outraged that an item doesn't fit. If the item was not at all as described, then sure, you're entitled to get your money back. If the seller posts the exact measurements and you don't take the time to match those up to your doll, that's on you.


Identifying Recasts
Generally, the easiest way to spot a recast sale is by price. Remember the old saying, "If it seems too good to be true, it probably isn't". If a doll valued at $550 is being sold for $150, it's probably a recast (or severely damaged - and should be listed as such).

Sellers claiming to have multiple dolls available that are from a company who has no dealers... probably a recast. If you happen across an eBay sale, look at how many it shows are available. 16 available of a limited release? No.

Look for company name and keyword spamming versus actual sculpt and company name in the listing. Recast listings usually look like this, "Luts Volks SD Iplehouse BJD doll SuperDollfie". Just a crap ton of BJD-related words crammed into one. A possible legitimate sales post will be listed more like this, "Fairyland Minifee Lishe normal skin". Like there will be actual information. Still do some investigating before you buy though.

Recast websites usually have a ton of different companies' dolls available, but the dolls will be listed similarly to the clusterwad example above. Just a bunch of company names and BJD related words smooshed together. Do some research to see who each company's official dealers are, as dealers can actually have multiple companies' dolls available. Legit dealers' sites will be much more organized and the listings will actually make sense. If still in doubt, look at the prices.

If the seller refuses to offer up more photos for you to check out headplates or official company marks, or refuses to send any proof of authenticity, let the sale go. If it can't be proven to be legit, it may not be.


Sellers
When you're selling an item secondhand, make sure you describe and photograph it as accurately as possible. List any and all possible damage. Take measurements and list those. You'll save yourself a lot of time if you go ahead and list everything, rather than answering 10 potential buyers' questions. Go ahead and show your for-sale wigs and clothes on a doll, as buyers will ask for photos before buying. List insole measurements for shoes ("SD-size" may get you by for clothes, but SD-sized dolls have different foot measurements). Same for wigs and eyes. Take more than one photo of your item, and try to get the photo as close to true color as possible.

Try to list the total price on your sales page. If you're not willing to absorb Paypal fees, go ahead and figure them up and include them in your listing price. It keeps buyers from having to figure up what the heck they're supposed to send you. Shipping can't really be listed exactly, as the cost will depend on where the buyer is located, but try to give buyers a speedy and accurate as possible shipping quote on request. Make sure to ask if the buyer would like insurance and tracking (if you don't require it already), since most people just assume it will be included. Send proof of shipping as soon as possible so buyers will know their packages are on their way.

Try to answer your buyers' messages promptly. There are some seemingly naggy buyers out there, but generally it's just that they're concerned or would like to make an informed purchase. I see a lot of negative feedback for sellers going days without attempting to return a message, especially after money had traded hands. Notify your buyers when something changes.

If you're willing to put items on hold, it's a good idea to request a non-refundable downpayment in case of flakey buyers. It'd be a shame to have an item on hold for a week and miss other potential buyers, only to find out the buyer changed their mind. Also, don't feel bad about reqesting that layaway payments be made on an exact date and non-refundable.

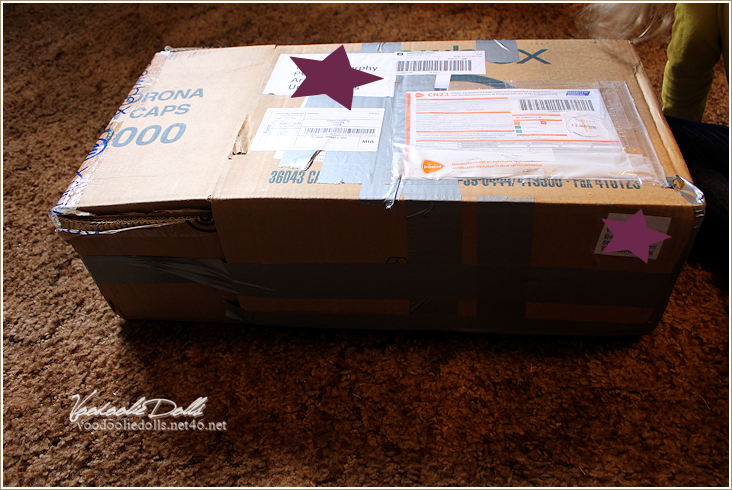
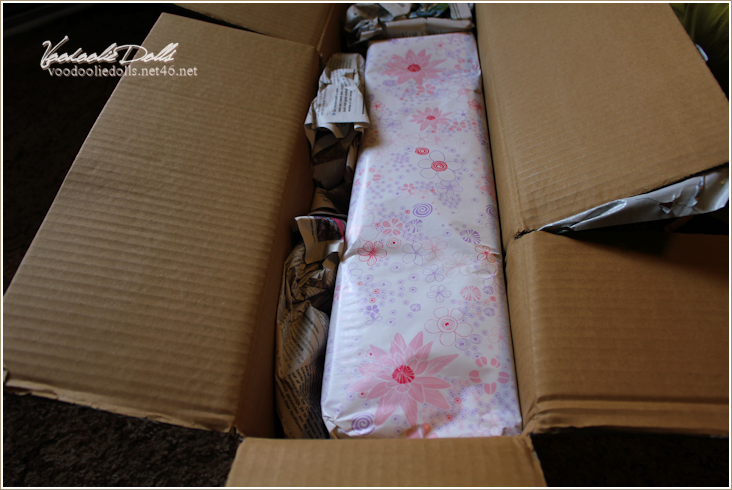
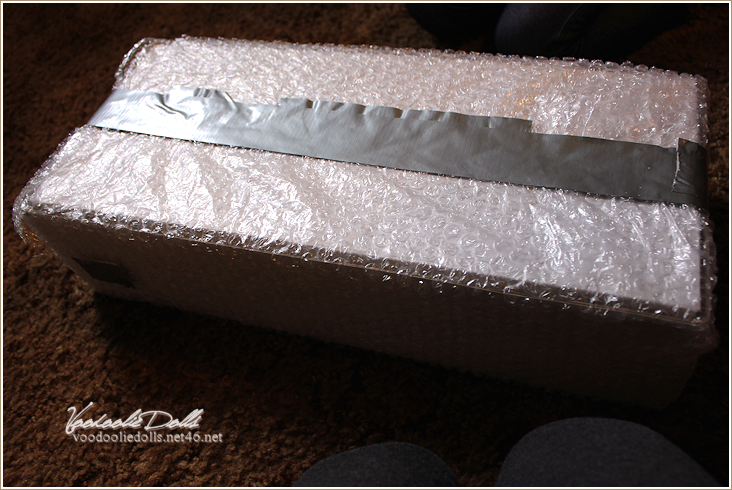
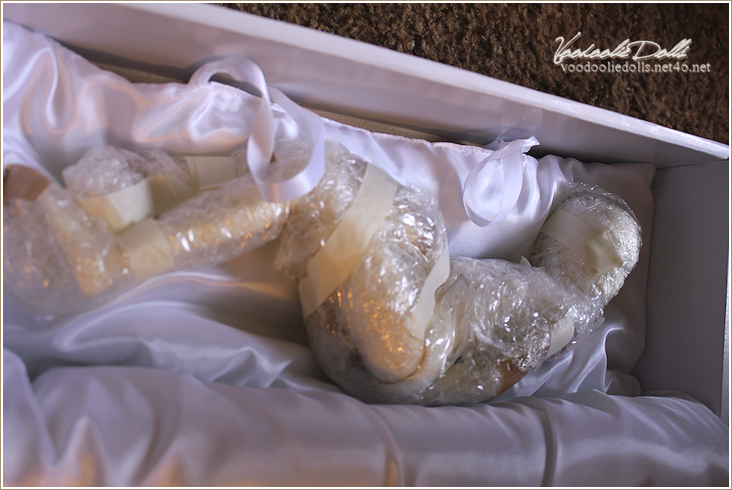
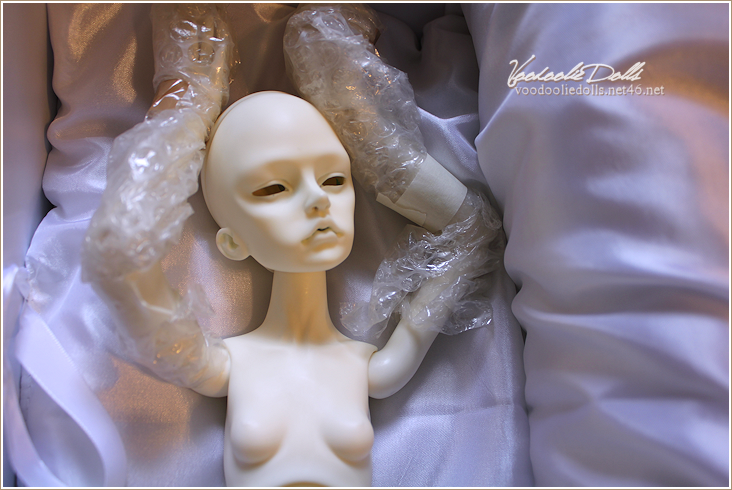
Pack your items securely! Make sure doll parts are wrapped so that they won't knock against each other. Pack wigs, clothing, and eyes so they won't be smooshed or damaged in transit. If a doll includes it's original box, be sure to find a bigger shipping box to put it in to protect it. Package items how you would want to receive them.

Sellers, please leave feedback as well.

Should I keep the box and stuff?

Quick answer, yes.

When a doll is first ordered, the company generally sends the doll packed in an official box with pillows for protection (sometimes a padded bag or formed foam) and the doll's certificate of authenticity. Most collectors consider all of the company sent items as part of the doll. Should you decide to sell, keep in mind many buyers will consider these things a must. So keeping them around and in good condition adds value to your doll.

CoA's are actually more important than a original boxes, as they can prove your doll's ligitimacy. If you keep nothing else, keep that safe.

1/3 dolls' boxes can take up a lot of space, so if you need to, some boxes can be folded down and tucked away for safe keeping. I actually keep mine in tact and use them to store all of that doll's accessories and clothing.

Yellowing

Resin yellows naturally over time due to certain compouds it's made up of. UV rays speed up the process quite a bit, but it will eventually happen to every BJD in time, regardless of how or where you keep it. Just go ahead and get it in your head before you purchase your first doll that yellowing (or mellowing as a lot of collectors call it) is just a part of the doll's aging process. Different companies resin and different skintones will age differently. Lighter skintones tend to show signs of yellowing more visibly for obvious reasons. French resin is the quickest to discolor, and will often turn very yellow, as opposed to just turning a creamier or tinted color.

Doll companies are offering options
Some companies have actually taken steps to protect their beautiful dolls from discoloration by offering the option of UV protected skintones (or anti-UV). The anti-UV option does cost a bit more than the original skintones, but may be worth it if you're constantly worried over yellowing.

Here is a test done by Withdoll, showing yellowing results in normal resin versus their UV protected resin (Real UV skin).

Slowing down yellowing
The single most important thing you can do to slow down the process is limit UV exposure to your dolls. Don't display them in an area that gets a lot of sunlight, especially direct sunlight. Now, I'm not saying your dolls have to become vampiric. Your doll won't instantly turn mustard yellow if you take them outside once in a while for a photoshoot. Just don't store them on a windowsill or anything.

There has actually been some debate about whether or not flash photography can expose dolls to UV rays, and expedite yellowing. This is just not the case. You'd have to rapidly take thousands of photos to even see a hint of discoloring. Even if you're an avid flash photographer and feel like you constantly have your camera in your doll's face, you still wouldn't be able to produce enough UV to actually damage it.

Sealing your doll with Mr. Super Clear UV Cut can help protect resin temporarily. Think of it as doll sunscreen. You will have to recoat over time though, because it can chip and wear off. This is especially true on the body, where the joints tend to rub sealants away quickly. Coated dolls tend to get dirty quicker as well, as sealants give dirt and grime something to stick to.

Wash your hands before touching your dolls. Natural oils on your skin and chemicals in hand creams are thought to react with the compounds in resin, speeding up discoloration.


De-Yellowing
One way to de-yellow is to buff the discoloration away with very fine-grit sandpaper. Notice, I said buff - not sand. With too heavy a hand, you could end up completely reshaping the doll's sculpt. Basically, you just want to remove the top discolored layer.

There are also owners who have done Oxiclean baths, but the results are mixed on this method. Some say it works wonders, while others have noticed no difference.


Don't let worrying about yellowing put a damper on your enjoyment of the hobby. Most owners don't mind the gradual color change, or even prefer the mellowed coloring over the original resin color. Do what you can to protect against it, but try not to overthink it.

Wig Information and Maintenance


Wigs can greatly change the appearance of your doll, so it's important to keep those locks in good shape.


Determining wig size
Different dolls (even doll of the same height or company) will need different sized wigs. Wigs are usually sized according to the wig cap's circumference in inches. For instance, if a wig's cap is 8.5 inches around, it will be listed as size 8-9. If the wig cap is 5.7 inches, the wig size will be listed as 5-6.

To determine what size wig your doll will need, you simply have to find out how many inches around the head is and match it to the wig size. If your doll has not arrived yet for you to measure it, you can usually find your doll's measurements on the doll's company website or with a little Googling.


Silicone (or other material) wig caps
When I said "wig caps" in the first bit, I was referring to the little cap the actual hair wefts are sewn into. Here, I'm talking about silicone wig caps. These are actually designed to go straight onto your doll's bald head and under the wig to help keep the wig in place. They also help to prevent dark wigs from staining. You can also use one of these under a too-big wig to help it fit more snug on the head. You can find silicone (or cloth) wig caps at most BJD dealers' websites for $3-6 each.

photos by Dollmore and Facets


Other methods of keeping a wig in place
If you'd prefer not to buy a wig cap, there are other ways to keep a wig from slipping. I have actually used thick flat rubber bands around my doll's bald head. If you have a dark wig, you can also take a little plastic wrap and shape it to your doll's head, then wrap the rubber band around to help hold the wrap. Some owners will take some adhesive velcro and stick the coarse side to the top/front of their doll's head. The velcro will grab onto the wig's inner cap and keep it from slipping. I've even seen people use tape to hold wigs on. I'd advise against using anything that may leave a residue on your doll's head though.


Wig Care
Roughly brushing a wig is the easiest way to break the fibers and cause unsightly flyaways. If you have to remove knots, start with the ends of the fibers and carefully work at the knots. Toothbrushes make great dolly hairbrushes. The bristles are soft and easy on the hair, causing less breakage.

If you do end up with a few flyaways, taking a fresh dryer sheet and smoothing it over the wig's surface can often help to tame stray hairs down and remove static... Plus, it makes everything smell nice ;) Volks also has a wig spray available to help with styling and untamed manes.

photo by Volks


Before you throw away a damaged wig, try to soak it in fabric water mixed with fabric softener, rinse, and air dry first. Sometimes it can really soften and smooth a well-used wig.

Don't use hot-styling tools on a wig unless you know for a fact it is heat-resistant. If it's just plastic fiber, it will melt and singe your wig.

Make sure not to squish your wigs during storage. Roll some paper up and stuff it inside the wig cap to help it keep it's shape. Also, it's a good idea to keep your wigs separated so they don't tangle together. You can keep and use the little nets they come in to help keep them neat and tidy while you're not displaying them on your doll. Owners with the luxury of extra space (sadly not me) have fashioned wig stands to keep their wigs in pristine condition.

Cleaning and Stain Prevention/Removal

A dirty doll is a loved doll... but that doesn't mean we can't clean them ;)

Dolls eventually need a good bath, whether they're handled often or just sat up on display. A lot of things can cause a doll to get dirty: oils on our skin, dust, what we sit them on, even their own wig and clothing.

Magic Sponges/Erasers
You'll want to buy some magic sponges. The Mr. Clean Magic Erasers are widely available in most stores, including Walmart. Just check out the cleaning supplies isle. These little babies will take off most grime, and even a lot of stains. A lot of faceup artists use these to aid in old faceup removal. Magic erasers do have slight sandpaper-like qualities so be careful when using them on your doll's face (or body if blushed). You'll want to be very careful when using these on tan dolls, as it can remove the coloring if you're too heavy handed. Wet the sponge and wring it out good before use. You can get a lot of use out of just one too, so they're a must-have for doll owners.

Tricky Stains
Sometimes a stain really sets into the resin, and a magic sponge just won't get it out. You can use a fine-grit sandpaper and gently buff these stains away. Use a light hand, since you are actually removing the top layer of resin. You don't want to end up completely altering your doll's appearance. You will not want to sand a tan skin doll in any way, as it will take off the coloring.


Stain Prevention

There are some ways to help prevent staining in the first place.

-Soaking your doll's dark-colored clothing in vinegar before wear sets the dye in the cloth, helping to keep it from staining your dolls body.

-Silicone wig caps under your doll's wig can not only help your doll's oversized wigs fit better, but also keep dark wigs from staining your doll's head. If you don't want to buy a wig cap, you can fashion one out of cling wrap.

-You can't really use the old vinegar soak trick for shoes, so put socks on your doll to keep their feet clean.

-Wash your hands before handling your doll. Also, make sure to position your doll's head by grabbing them behind the ears. This keeps you from accidentally damaging the faceup. You want to avoid getting the faceup dirty, since it's more delicate to clean.


Heavy Duty Cleaning

About once a year or so, I like to give my dolls a good rub-down with 100% acetone. It removes just about anything that a magic eraser can't. This is hardcore stuff, so please be very careful if you decide to use it on your own doll. Some owners have reported bad resin reactions to acetone, so you'll have to decide for yourself if you want to give it a try. I haven't had any bad experiences with it yet. Work quickly with it, and never soak your doll in it. Wash parts with dish soap and warm water after, because acetone will melt resin with prolonged contact. Do not use on any aesthetic work... it will take it all off.

Improving Posability

Sometimes even a well strung doll will still be difficult to get to hold a pose. Here are a couple of methods to help your doll strike a pose.


Sueding

Sueding is putting something in the sockets of your doll's joints to cause friction. Resin can be very slick so when you pose your doll, the resin may need something to grip to hold. There are several ways to do this. Here are the ways I know of. This is one of the easiest improvements you can make to your doll, so don't be afraid to try.

Hot Glue Sueding
In this method, you'll actually be putting hot glue into your dolls joints. Hot glue stays rubbery, which helps to give the joints more friction while posing. You'll want to take your doll apart. Take a low-heat glue gun and put dots of glue all around the inside of the socket of the joint. Be sure not to touch the metal tip to the resin, as it'll melt it. Take a piece of paper (to prevent burning yourself) and spread the glue around in the joint. Try to get it smooth-ish, but don't spread it too thin. Now, I'm saying not to spread it too thin, but you don't want it so thick that the ball joit won't fit back in. Make sure it's completely dry and you're done. If you decide later that you want to remove it, the glue just peels off easily.

Here is a link to American Doll Outfitter's hot glue sueding tutorial to help you get a visualization.


Kips
Kips are silicone disks you insert into the doll's joints during stringing. They're actually sold through several BJD dealers such as Volks. Kips work much like other forms of sueding, except they're not actually fixed in joint.

Image belongs to Volks

Pliver Sueding

Pliver is a thinly pressed piece of leather (or any thin leather like material). Cut circles in it that are about the same circumference as your doll's joint sockets. Cut a slit from the middle of your circle out. This will help the material fit into the socket. Spread a little glue (you can actually use Elmer's glue) into the socket, then press the circle in. Let everything dry completely and reassemble your doll. That's it :)


Wiring

Wiring is where you thread wires through your doll's arms and legs. You'll need to make sure your wire is thin enough to fit through the stringing holes, but not so thin that it won't support the doll's limbs.

For arm wiring, you'll need to cut a length of wire that will run from inside your doll's shoulder stringing hole and down the arm to about the middle of the lower arm piece. For leg wiring, you'll need a piece of wire that can run from inside your doll's hip stringing hole and down to about mid-calf. Make sure you leave enough wire inside the doll's body so that it won't pop out when you bend the limbs.

To insert the wire, just pull your dolls limb apart to where you can see the elastic and push the wire inside, threading it through.

You'll probably want to use some sort of coated wire and wrap electrical tape around the ends where it is cut. You don't want the wire to scratch up your doll's insides. You can use uncoated wire, but you may want to wrap it in tape.

Strings and Things

Ball Jointed Dolls are held together with elastic cords that are strung through their limbs and body and hook to their hands, feet, and head. Over time, these cords loosen, making it harder to pose the doll or causing the doll to become floppy. Sometimes even brand new, straigh from the company, dolls will arrive looser than you'd like.

When, not if, you find yourself in a situation where you think restringing may be necessary, don't fret. It's generally not complicated, and is a basic component in BJD maintenance.

In alot of cases, you may not even need to replace the elastic, so much as tighten it. If your elastic isn't frayed and is still in good condition, you can actually just untie the knots, cut the elastic to shorten it, and tie the knots back. If your elastic is damaged or old, you will need to purchase some new. Different dolls take different elastic cord thicknesses, so you'll have to do a little research to see what kind will work best in your doll.

What you'll need
-elastic cord in your doll's size
-white ribbon (or a stringing hook if you have one)
-a clean soft surface (I usually put a blanket down)
-hemostats also help, though they're not absolutely necessary

I only recommend using white ribbon, as the dye in colored ribbon can stain your doll. The ribbon is used to help you pull the elastic through the small stringing holes in your doll's body. I recommend doing all doll assembly on a soft, clean surface. The tugging and moving around of the doll you'll be doing can cause stains and scratches. I generally will lay down a towel or blanket and sit in the floor to restring. Hemostats are pretty handy to have, as they clamp down on the tightly pulled elastic and give you less tension when trying to loop the string around a hand or foot hook. It can be done without hemostats by holding the part with your foot and pulling the elastic out of the bottom, then looping the hand or foot on, but it's harder to work with tight elastic.


Taking apart
Sort of take a mental note of where the knots are hidden in the body while you're taking your doll apart. These knots will need to go back into those places.
1. I always start by removing the head. Take the headcap off and you should see a hook (or something similar) holding the elastic. Normally, to take off the head, you pull up on the hook and twist it. The head will come right off, so be careful.

2. Now you should have just a fully assembled body with an S-hook for a head. Creepy, no? I like to remove a foot first. Pull your doll's foot until you can see the hook and slip the elastic off. Either both legs should come apart (if your doll has one piece of elastic for both legs), or that one leg will come loose (if your doll has a piece of elastic for each leg). Remove the loosened body parts and set them to the side. If you have a separate elastic piece for each leg, unhook from the other foot and repeat. Pull the loose elastic from the neckhole and set aside (or throw away if you're using new string).

3. Ok, now you have a headless torso with arms. Just keeps gettin' better huh? If you have a two-piece torso, the bottom part should have come loose when you removed the elastic for the legs. Use the same method to remove the arms as you did the legs. Remove the hand and pull the elastic out.

Now your doll is disassembled. Don't freak out.


Assembling
1. I always start with the legs/body. Fold your elastic loop in half and hook the S-hook onto the middle (with the larger hook side down). If you have a string for each leg, then hook the larger end of your S-hook through the top of both loops. If you have a one-piece body, you may want to go ahead and lace your ribbon through the elastic loops one by one, thread the ribbon through the body, and pull the elastic through the leg holes. If you have a multi-piece body, you can probably just poke the elastic through the holes and thread through until you get to the hip piece, then you may need to use the ribbon.

2. Now you'll need to thread each leg joint onto your ribbon (attached to your elastic) and pull the elastic all the way through to the point where you'll attach the foot. You may need to stick something in the loop for the other leg so the cord doesn't pull through the body while you're working on the leg. Alot of people use hard objects, like a pen or a chopstick. I've had hard objects actually dent the resin, so I roll up a rag and stick it in the other loop to hold it outside of the body.

3. You'll need to hook your foot on the current leg. If you're using hemostats, clamp them down on the elastic, leaving yourself a little loose loop at the end. Hook the foot on. If you're not using hemostats, try to do the same thing with your fingers. Or pull the elastic out far enough that you can hook the foot on while the string is still tight.

4. Repeat for the other leg.

5. Exhausted yet? ;P Don't worry, it can be frustrating (especially the first time), but it's worth it. You'll start on the arms now. Thread the elastic through the one arm hole and out the other side of the body. Stuff your rag into the elastic loop on the other side to hold it. Thread your elastic through all the arm joints with your ribbon just like you did with the legs. Hook your hand on. Repeat on the other side.

6. Now your doll's body should be back together. Sit the head on the neck and loop your ribbon around the head's S-hook. Pull up and twist to lock the head on. Replace headcap.

Tada! You did it! Don't worry if you didn't get it perfect the first time. It'll get easier the more you get accustomed to how your doll works.

A tip for Tinies
Tinies mean tiny stringing holes. Instead of ribbon, try dental floss or thin wire to thread the elastic through easier. You can also try using a crochet needle to pull the string through, though you may have to bend it slightly for some dolls.

Below are some tutorial links to help give you a better visual:
For more detailed stringing, Google search "your doll's brand/sculpt name stringing tutorial"

Kagen-no-tsuki's 1/3 BJD Restringing Steps
Balljointedwoman's Stringing or a U-noa Qu'luts Sist doll

Places that sell stringing kits

Junkyspot
Cool Cat (also has some neat tables for string sizes)

The Dolls

The Everchanging Wish Pot
-Doll Leaves Amara
-Resinsoul Ling
-Dollzone Leon
-Dollzone Freddy
-Souldoll Yeon-Bee
-Doll Leaves Emily
-Fairyland Minifee Lishe
-Zaoll Luv
-DIM Marcellina
-Supiadoll Muriel


On the Shelf


Danika

View her Flickr Album
Sculpt: Dollzone Freddy Type-1
Skintone: white
Body Type: female body b45-008
Year Made: 2013 Summer Event
Arrival Date: January 26, 2015
Purchased from: Facebook Sales Group
Faceup: Voodoolie (myself)
Aesthetic work done: hot-glue sueding, slight reparative sanding on eye socket
Eyes: none yet
Wig: none yet


Denahli

View her Flickr Album
Sculpt: Fairyland Minifee Chloe
Skintone: natural skin
Body Type: Active-line body, C-bust (large), Cutie legs, #8 hands
Year Made: unknown
Arrival Date: December 25, 2014
Purchased from: Christmas gift from my husband
Faceup: Voodoolie (myself)
Aesthetic work done: slight sanding of ears/face/hands, hot-glue sueding, hand blush/manicure
Eyes: 12mm unknown grey glass
Wig: none yet


Wren


Wren's New Eyes
View Her Flickr Album
Sculpt: Resinsoul Ling
Skintone: white skin
Year Made: 2013
Arrival Date: September 26, 2014
Purchased from: DoA Marketplace. I am the second owner.
Faceup: Voodoolie (myself)
Aesthetic work done: facial/body stain removal by sanding, faceup, full body blush, mani/pedi, eyelash application
Mod work done: hot-glue sueding, toe separation, nose reshaped, breasts slightly sanded
Eyes: 14mm Unknown brand two-tone purple glass
Wig: Volks


Baha Kitty


Baha gets a new face
View Her Flickr Album
Sculpt: Piposland Baha Kitty (first release)
Skintone: white skin
Year Made: unknown
Arrival Date: December 15, 2014
Purchased from: Facebook Sales Group (This doll was purchased to be a surprise Xmas gift for my sister)
Faceup: Voodoolie (myself)
Aesthetic work done: faceup and ear blushing
Mod work done: hot-glue sueded
Eyes: 16mm Unknown brand light blue glass
Wig: none


Dorian


Dorian's second faceup by me.
View His Flickr Album
Sculpt: Souldoll Lupinus
Skintone: normal skin
Year Made: 2002
Arrival Date: 2007 This doll was given to my sister and now belongs to her
Purchased from: Junkyspot member.
Faceup: Voodoolie (myself)
Aesthetic work done: faceup
Mod work done: hot-glue sueding and toe separation
Eyes: 16mm unknown brand purple acrylics
Wig: n/a